Your Cart is Empty


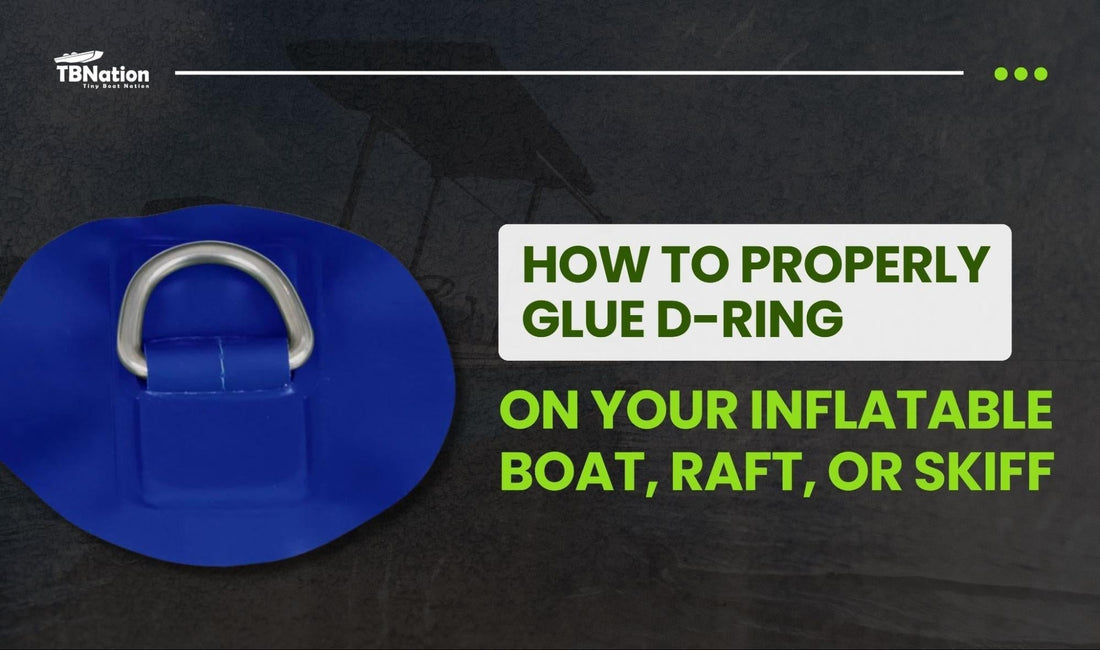
How to Properly Glue D-Ring on Your Inflatable Boat, Raft, or Skiff
Key Takeaways
- Attachment points are essential for inflatable boats, rafts, and skiffs. They provide reliable spots for securing gear, towing lines, anchors, and safety ropes, enhancing both safety and functionality.
- Proper installation is critical. Choosing the right placement, cleaning and sanding the surfaces, and using a compatible marine-grade adhesive ensures a strong, long-lasting bond.
- Select the right type. Stainless steel options are ideal for heavy-duty and saltwater use, while nylon versions are lightweight and corrosion-resistant for lighter applications. Always match the base material to your boat surface (PVC or Hypalon).
- Step-by-step installation matters. Applying thin coats of vinyl cement, allowing tackiness, and pressing the hardware properly prevents lifting and air pockets. Using multiple attachment points can distribute stress in high-load areas.
- Regular maintenance extends lifespan. Clean with fresh water, inspect for wear or corrosion, avoid excessive heat, and lubricate metal parts to prevent failure and maintain durability.
If you own an Inflatable Boat, Raft, or Skiff, one of the most important accessories you can install is the D-Ring. This small but powerful piece of hardware provides secure attachment points for gear, towing lines, anchors, and safety ropes, making your watercraft more functional and safe. Choosing the right location, preparing the surface properly, and using a compatible marine-grade adhesive are key steps for a strong, lasting bond. Skipping them can lead to peeling, weak attachment points, or material damage.
Proper installation is only the beginning. Regular maintenance, cleaning, inspection, and protection from extreme heat, extends the lifespan of your D-rings and prevents corrosion. Adding backing patches or using multiple rings in high-stress areas enhances durability.
Why D-Rings Are Essential for Inflatable Boats, Rafts, and Skiffs
A D-ring is a metal or nylon ring shaped like the letter “D,” attached to a patch that bonds directly onto your boat’s surface. It serves as a durable anchor point for securing coolers, gear, ropes, or safety lines. Inflatable boats don’t have rigid mounting points, so properly glued D-rings are the best solution. When installed correctly, they remain secure under rough conditions, heavy loads, and temperature changes.
Choosing the Right Type of D-Ring
Selecting the correct type ensures long-term strength and compatibility. Stainless steel D-rings are the top choice for marine use because they resist rust and corrosion in both freshwater and saltwater. For lighter-duty needs, high-strength nylon rings provide solid performance with reduced weight.
The patch fabric should match your boat’s material, PVC rings for PVC boats, Hypalon rings for Hypalon boats. Using mismatched materials can lead to weak bonding or early failure.
Tools and Materials
- D-ring attachment– Stainless steel for strength or nylon for lighter applications.
- Marine-grade adhesive –Use PVC or Hypalon-specific glue depending on your boat material.
- Isopropyl alcohol or acetone –Removes grease and residue before bonding.
- Mild detergent and water– Cleans dirt and salt before adhesive application.
- Fine sandpaper or scuff pad –Roughens surfaces to improve adhesion.
- Small brush or roller–Applies glue evenly.
- Masking tape–Holds the patch steady while curing.
- Marker or pencil–Marks placement precisely.
- Clean rags–Wipes away excess glue or cleaner.
- Protective gloves –Keeps hands clean and surface oil-free.
- Well-ventilated workspace – Ensures proper curing and safety.
Step-by-Step Installation of D-ring with Glue
Step 1: Choose Placement

Pick a flat, smooth area where the D-ring will be most useful, on the deck, side tube, or stern. Ensure it’s easily reachable for ropes or gear and won’t interfere with paddling or seating.
Step 2: Clean Surfaces

Use alcohol or thinner to remove all dust, wax, and grease from both the patch and the boat area. Proper cleaning ensures the adhesive bonds securely.
Step 3: Apply First Coat of Vinyl Cement

Using a brush, apply a thin coat of marine vinyl cement to both the D-ring patch and boat surface. Let it dry until tacky to the touch, slightly sticky but not wet.
Step 4: Apply Second Coat

Apply a second thin layer evenly over both surfaces. Avoid thick coats that can create weak spots. Make sure all edges are covered for full adhesion.
Step 5: Position and Press D-ring

Align the D-ring carefully over the marked area. Press from the center outward to remove any air bubbles. Use firm pressure and smooth the edges for a tight seal. Wipe away any excess glue and allow it to cure undisturbed.
The "Arctic vs. Tropical" Factor: Adhesive Performance in Extreme Climates
One of the biggest mistakes builders make is ignoring how temperature affects the chemical bond. While D-ring patches and Hydro-Turf are resilient and won't shatter in freezing weather, the adhesive has specific atmospheric requirements.
- The Installation Sweet Spot: For a secure bond, youmust perform the installation in a warm, dry environment—ideally above65°F.
- The "Arctic Builder" Hack: If you are taking your skiff into freezing marine environments, standard peel-and-stick may need an assist.
- Expert Tip: We recommend applying an additional marine-grade contact cement to the edges of the patch during a warm-weather install to prevent "edge-peel" when the aluminum hull contracts in freezing water.
Understanding Load Limits: Shear vs. Peel Strength
Before you strap down heavy equipment, you need to understand how much weight your glued D-rings can handle. These are designed forShear Strength (pulling sideways across the surface) rather thanPeel Strength (pulling directly up and away from the hull).
- Avoid the "Point of Failure": High-load items, such as a large battery, should never rely on a single attachment point.
- The TBN Strategy: Distribute weight by using multiple D-rings. For complex builds like a V Hull Jon boat, proper planning of these anchor points prevents performance issues and improves long-term usability.
- The UV Warning: Direct sunlight can soften certain adhesives over time. Always perform a "Thumb Test" on the edges of your D-rings to ensure there is no "ooze" or movement before tightening your ratchet straps.
Quick Checklist for a Professional Bond:
- Cleanliness is King: Use isopropyl alcohol or acetone to ensure the hull is free of dirt, grease, and old adhesives.
- No Twisting: Ensure your patch is laid flat and centered without twisting the material, which causes misconnections and internal tension.
- The 24-Hour Rule: While the glue might feel tacky quickly, full chemical cross-linking takes a full24 hours. Do not apply tension to the D-ring until the cure is complete!
Suggested Keywords for Search Console:
- Marine adhesive temperature range
- How much weight can glued D-rings hold
- D-ring glue for inflatable boats
- DIY boat building anchor points
- Preventing adhesive failure in cold weather
How to Maintain and Extend the Life of Your D-Rings
Regular Cleaning
After each use, especially in saltwater, rinse your D-rings and surrounding areas with fresh water. Salt and sand can weaken adhesive bonds and corrode metal. Use mild soap if needed, then rinse and dry completely.
Periodic Inspection
Inspect your D-rings regularly for peeling, cracking, fraying, or rust. High-stress points may show wear sooner, so pay special attention to those. If you spot minor lifting, reapply adhesive immediately.
Avoid Excess Heat
Keep your inflatable out of prolonged direct sunlight or hot storage areas. High temperatures soften glue and can cause patches to lift. When not in use, cover or shade your boat.
Lubricate Metal Rings
Apply a light coat of marine-grade lubricant to stainless-steel D-rings occasionally. It prevents corrosion and keeps them moving smoothly when tying ropes. Wipe off excess lubricant to avoid dirt buildup.
Common Mistakes to Avoid
- Skipping cleaning or sanding: Dirt or oil prevents strong adhesion. Always clean and lightly sand surfaces before gluing.
- Using the wrong adhesive:Mismatched glues can fail quickly. Verify compatibility with your boat’s material.
- Applying glue too thickly:Thick layers trap air and weaken the bond—thin, even coats are best.
- Rushing curing time:Allow at least 24 hours for the glue to set before applying tension.
- Installing on curved areas: Uneven surfaces prevent proper contact; always mount on flat areas.
Expert Tips for a Stronger Bond

- Warm the adhesive slightly (around 70–80°F) before applying for better flow and bonding.
- Use a backing patch under the D-ring in high-stress spots for extra strength.
- Install multiple D-rings to distribute load evenly.
- Check the adhesive’s expiration date, fresh glue guarantees stronger bonds.
- Keep spare glue and cleaner in your repair kit for emergency fixes.
Troubleshooting D-Ring Issues
Removing a Loose Ring
If a D-ring starts peeling or you need to replace it, gently heat the area with a hairdryer to soften the glue. Slowly lift the patch without pulling too hard to avoid tearing the fabric.
Cleaning Old Adhesive
After removal, wipe away all leftover glue using acetone or rubbing alcohol. Make sure no residue remains before reinstalling, as leftover adhesive can block new glue from bonding.
Surface Preparation
Lightly sand both the boat area and the back of the patch to create a rough texture, then clean them again. A properly prepared surface ensures maximum grip.
Reapplying Adhesive
Apply two thin, even coats of glue on both surfaces, letting each dry until tacky. Align carefully, press firmly, and smooth the edges to eliminate bubbles.
Curing Before Use
Let the adhesive cure for the full recommended time, usually 24 hours, before applying any tension. Avoid launching or loading the area too soon, as this can cause the bond to fail prematurely.
Safety and Storage Tips
Store your boat in a cool, dry area when not in use. If deflated, make sure the D-rings are dry before folding to prevent mold or moisture damage.
When to Replace D-Rings
Replace your D-rings if you notice deep cracks in the patch, rust that can’t be removed, or frayed attachment loops. Over time, repeated stress and UV exposure can weaken even the strongest materials. New D-rings are inexpensive, and replacing them early prevents damage to the boat fabric.
Environmental Care
Dispose of old adhesive, rags, and chemical cleaners responsibly. Avoid spilling glue or solvent into the water. Many marine supply stores accept used materials for proper disposal.
Final Thoughts
Learning how to install and maintain D Rings is a simple but essential skill for any inflatable boat, raft, or skiff owner. With the right preparation, adhesive, and technique, you can create durable attachment points that last for years. These rings add flexibility and safety to your setup, allowing you to secure cargo, towing lines, and gear confidently. Regular inspection and proper care ensure that your D-rings stay strong through countless trips.
Frequently Asked Questions
1: What is an attachment ring and why is it important for my inflatable boat?
An attachment ring is a metal or nylon ring shaped like the letter “D,” mounted on a patch that bonds to your boat’s surface. It provides durable points for ropes, gear, anchors, and safety lines, enhancing the overall functionality and safety of inflatable boats, rafts, and skiffs.
2: Should I use stainless steel or nylon rings?
Stainless steel rings are best for heavy-duty applications, saltwater use, and maximum durability, while nylon rings are lightweight, corrosion-resistant, and suitable for lighter loads. Choose based on your specific needs and the type of boat.
3: How do I ensure a strong bond when gluing a ring?
Clean and roughen both surfaces thoroughly, apply thin coats of marine-grade adhesive compatible with your boat material (PVC or Hypalon), let the glue become tacky, then press and hold the ring firmly in place. Allow full curing time before use.
4: Can I install a ring on a curved surface?
No, rings must be installed on smooth, flat areas to ensure complete contact with the adhesive. Curved or uneven surfaces can result in weak adhesion and premature failure.
5: How do I maintain the attachment points?
Rinse with fresh water after every use, inspect periodically for peeling or corrosion, avoid prolonged heat exposure, and lubricate metal parts occasionally. Proper maintenance can significantly extend the life of the rings.


Recent Posts


Please select the Blog in the settings on the right sidebar to display it
Join Our VIP List
Join the Tiny Boat Nation VIP Members List.
It's Free! Stay Up To Date With Announcements, Product Give Aways, News and Promotions.