Your Cart is Empty


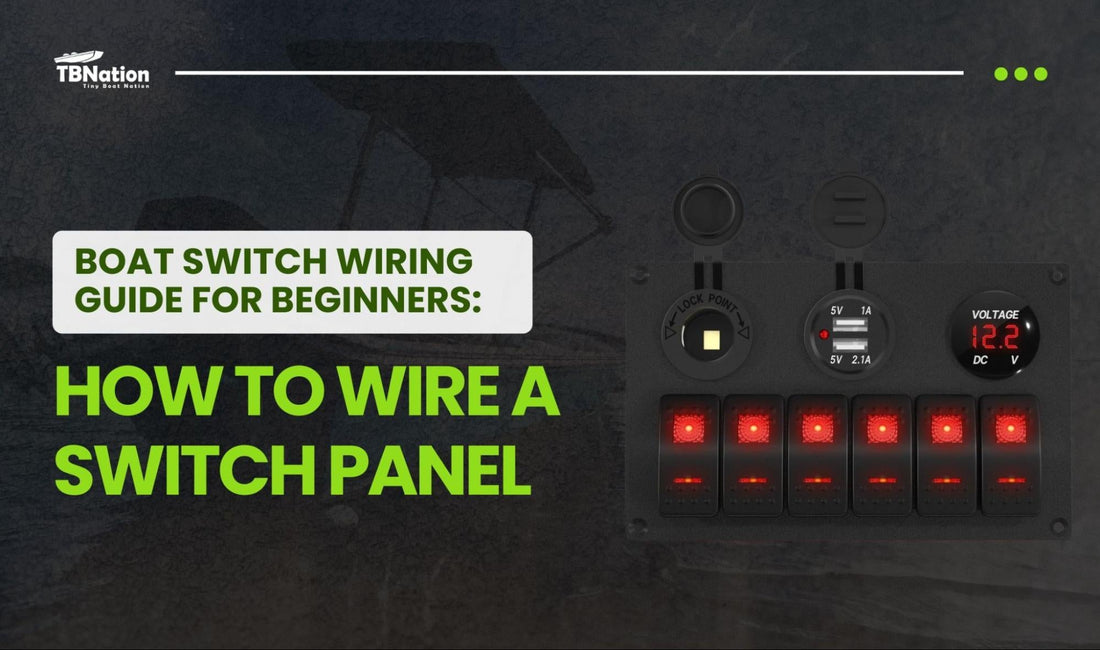
Boat Switch Wiring Guide for Beginners: How to Wire a Switch Panel
Key Takeaways
- Switch wiring is crucial for boat safety and functionality, It keeps your marine electrical system organized and ensures reliable operation of devices like lights, pumps, and electronics.
- Plan your switch panel wiring layout before installation, Listing all electrical loads and sketching wire routes helps prevent mistakes and allows for easier future upgrades.
- Use only marine-grade wiring and connectors, These materials are corrosion-resistant and built to withstand the harsh conditions of the marine environment.
- Fuse every circuit individually for safety, Inline fuses or a marine fuse block protect each connected device from electrical overload or short circuits.
- Label and secure your wiring for easy troubleshooting, Organized panel wiring saves time during repairs or upgrades and helps prevent system failures due to loose or damaged wires.
If you're just getting into marine electrical work, understanding switch wiring is one of the most valuable skills you can develop. Whether you're outfitting a new boat, upgrading old electrical systems, or simply adding a few accessories, knowing how to manage your boat's electrical connections will save you time, money, and potential headaches down the line.
Learning the basics of switch panel wiring ensures your setup is safe, reliable, and easy to troubleshoot. In this guide, we’ll walk you through the essential concepts of boat wiring, explain what tools and components you need, and show you how to wire a switch panel step-by-step.
Why Switch Wiring Matters on a Boat
Every boat with electronics requires a clean and organized panel wiring setup. Without it, you risk overloaded circuits, equipment failures, or even electrical fires. A well-wired switch panel not only gives you full control over onboard devices but also adds to your boat’s value and usability.
Switch wiring becomes especially important if you run accessories like navigation lights, bilge pumps, fish finders, or sound systems. These devices all require reliable power, and managing them through a centralized switch panel keeps things neat and efficient.
How to Wire a Switch Panel
Step 1: Connect Power to the Panel
Run a red (positive) wire from your battery or fuse block to the switch panel’s positive input terminal. Be sure to include a fuse or circuit breaker near the battery to protect the entire panel. This main wire supplies power to all the switches on your panel.
Step 2: Connect the Ground
Connect a black (negative) wire from the battery or negative bus bar to the panel’s ground terminal, if available. Every electrical circuit needs a return path to complete the flow. Without a proper ground, your devices won't function correctly or safely.
Step 3: Wire Each Switch to Its Device
Attach a wire from each switch’s output terminal to the device it controls (e.g., lights, pumps, electronics). Make sure to match each switch with its corresponding accessory. Label both ends of every wire to avoid confusion during future maintenance or upgrades.
Step 4: Add Inline Fuses or a Fuse Block
Protect each circuit by installing an appropriately sized inline fuse or by connecting it to a marine fuse block. This ensures each device is individually protected from short circuits or overcurrent. Never skip this step — it’s critical for safety.
Step 5: Connect the Accessories
Once your wires are routed, connect them to each device using marine-grade connectors, ideally with heat-shrink insulation for durability. Ensure both the power and ground connections are secure. Loose terminals can cause failures or heat buildup over time.
Step 6: Test the System
Turn on your master battery switch and activate each switch on the panel one at a time. Confirm that each accessory powers on and operates as expected. If something doesn’t work, check your wiring, fuses, and voltage with a multimeter.
Understanding the Basics of Boat Wiring

- Voltage and Amperage - Most small to mid-sized boats operate on 12V DC systems. Each device (light, pump, etc.) draws a specific amount of amperage. Multiply voltage by amps to calculate wattage. This determines how thick your wires should be.
- Fuse Protection - Every circuit connected to your switch panel should have its own fuse or breaker. Fuses protect both your equipment and the wiring from damage due to electrical overloads.
- Wire Gauge and Materials- Marine-grade tinned copper wire is essential. It resists corrosion and handles current more efficiently than standard copper wire. Always size your wires based on the current (amps) and the length of the run.
Planning Your Switch Panel Wiring Layout
List All Electrical Loads
Make a comprehensive list of every device you plan to connect to the switch panel. This can include navigation lights, anchor lights, bilge pumps, deck lighting, horns, and electronic devices like depth finders or radios. Be sure to note the amperage rating for each device to properly size your wires and fuses.
Determine Switch Panel Size and Location
Choose a switch panel that has enough switches to accommodate all your current devices, plus a few extras for future upgrades. Install the panel in a location that’s easy to reach, protected from water and weather, and preferably close to your power source to minimize wiring runs.
Sketch Your Wiring Pathways
Plan out the route each wire will take from the switch panel to the battery, fuse block, and each connected device. Aim to keep wiring runs as short as possible and avoid areas with sharp edges or moving parts that could damage the wires. Proper routing helps maintain a clean, safe, and durable wiring system.
Common Mistakes + Troubleshooting Tips
Using Non-Marine Materials
Using standard automotive wire, connectors, or terminals can corrode quickly in saltwater environments. Always use marine-grade wires and connectors to prevent failures.
Incorrect Fuse Sizing
Installing fuses that are too large or skipping fuses leaves circuits unprotected and can cause overheating or fires. Check each fuse rating against the device amperage and replace or add fuses as needed.
Loose or Poor Connections
Loose terminals or poorly crimped connections create resistance, heat, and intermittent device operation. Inspect all connections regularly and tighten or redo crimps where necessary.
Improper Wire Routing
Routing wires over sharp edges, hot surfaces, or moving parts can cause insulation damage and short circuits. Reroute wires, use clamps, and add protective sleeves to prevent wear.
Skipping Testing Steps
Not testing each switch and device individually can leave unnoticed faults. Use a multimeter and test all switches before finalizing the installation.
Neglecting Labels and Documentation
Without labeling wires or maintaining a wiring diagram, troubleshooting becomes slow and error-prone. Clearly label circuits on both ends and keep an updated diagram for future maintenance.
Overtight or Tight Runs Without Slack
Pulling wires too tight or not leaving service loops can strain connectors and terminals. Leave a little slack and create loops to allow for movement, repairs, or upgrades.
Troubleshooting Tip:
If a device doesn’t work, check the fuse first, then the switch, wire continuity, and terminal connections in order. Most failures come from simple issues rather than major system faults.
This sub-section will help readers avoid common DIY pitfalls and maintain a safe, reliable switch panel system.
How to Maintain a Safe and Organized Wiring Setup
- Use Marine-Grade Materials -Always use marine-rated wires, terminals, and connectors, as they are designed to withstand moisture, salt, and vibrations. Regular automotive components can corrode quickly in marine environments, leading to failures or unsafe connections. Investing in marine-grade materials ensures durability and performance.
- Keep Wires Secure and Labeled -Secure all wiring with zip ties, clamps, or mounts to prevent movement and wear. Make sure wires are routed away from hot surfaces, moving parts, and sharp edges. Label both ends of every wire clearly—this will save you a lot of time when diagnosing problems or making upgrades later.
-
Leave Slack and Service Loops -Avoid running wires too tight between components. Leave a little slack or create a small service loop to allow for future maintenance, component movement, or upgrades. This flexibility also reduces strain on connectors and terminals.
- Check for Heat or Loose Connections- After installation and during regular checks, feel for warm spots along wires and terminals while the system is running. Excessive heat usually signals resistance caused by a loose connection or an overloaded circuit. Tighten any loose terminals and investigate hot wires immediately to prevent damage or fire risks.
How to Expand Your Panel Wiring System
Add More Switches or a Second Panel
If your current switch panel is full, you can install an additional panel or daisy-chain a second one to the existing system. Just make sure your main power supply (wire and fuse) is capable of handling the increased amperage. Always double-check wire gauge and fuse ratings before expanding.
Upgrade the Fuse Block
When you begin running out of fuse slots, it’s time to add an auxiliary fuse block. This allows you to separate circuits cleanly and manage power distribution more effectively. It also reduces clutter and makes future modifications easier to handle.
Consider Circuit Labels and Diagrams
As your system becomes more complex, keeping accurate diagrams is essential. Label each circuit clearly on the switch panel and maintain a printed or digital wiring diagram. This makes troubleshooting, repairs, and upgrades much faster—especially if someone else is using the boat.
Final Thoughts on Boat Switch Panel Wiring
Learning how to wire a switch panel might seem intimidating, but it’s one of the most empowering skills for any boat owner or DIY builder. Cleanswitch panel wiring keeps your boat safer, more organized, and easier to maintain.
Whether you’re starting small with just navigation lights, or doing a full electrical overhaul, the fundamentals of switch wiring apply the same way. Focus on planning, protection, and precision — and you’ll have a system you can count on for years to come.
And if you’ve been asking yourself, “How do I upgrade my boat wiring without hiring a pro?” — now you know. With the right tools, materials, and approach, it’s completely achievable as a DIY project.
Frequently Asked Questions
1: What is switch wiring, and why is it important on a boat?
Switch wiring refers to the process of connecting electrical devices to a centralized switch panel. It's important for managing power safely and keeping your boat's wiring organized and reliable.
2: Can I install a switch panel myself without hiring a professional?
Yes, with the right tools and knowledge, DIY switch panel wiring is achievable. Following step-by-step instructions ensures safe and functional boat wiring.
3: What materials should I use for marine panel wiring?
Always use marine-grade tinned copper wire, heat-shrink connectors, and waterproof terminals. These materials resist corrosion and are designed for the marine environment.
4: How do I protect my devices in a boat wiring system?
Each device should be connected to the switch panel through an inline fuse or marine fuse block. This protects against electrical overloads and potential fires.
5: What should I do if I run out of switch slots on my panel?
You can either install a second switch panel or expand your system by upgrading your fuse block. Always ensure your main wiring can handle the added amperage.


Recent Posts


Please select the Blog in the settings on the right sidebar to display it
Join Our VIP List
Join the Tiny Boat Nation VIP Members List.
It's Free! Stay Up To Date With Announcements, Product Give Aways, News and Promotions.