Your Cart is Empty


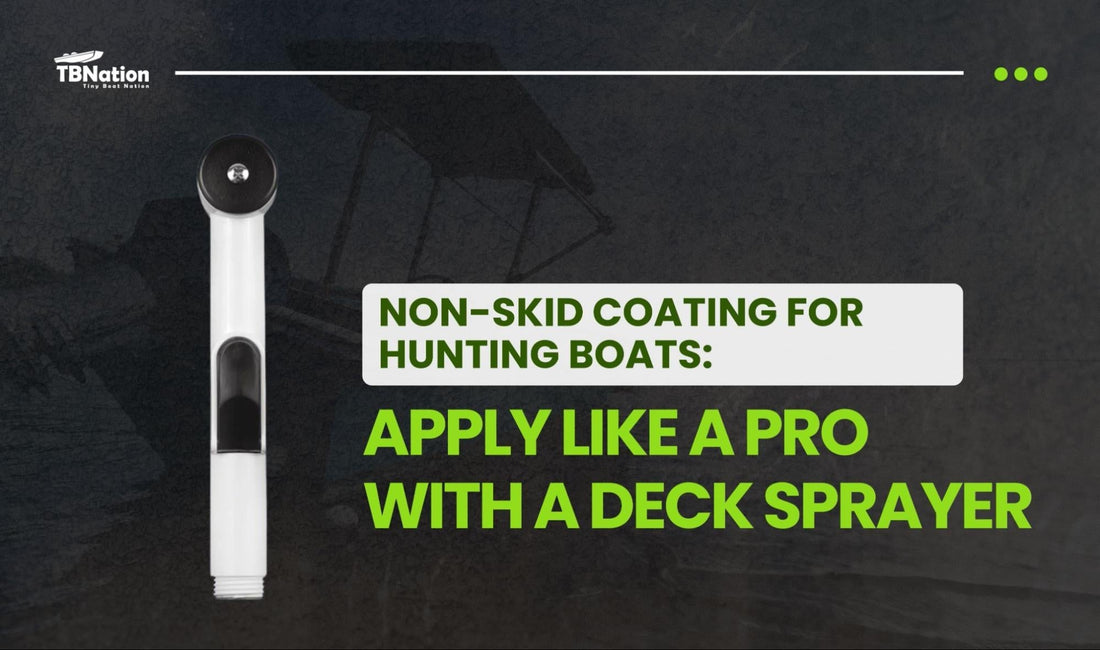
Non-Skid Coating for Hunting Boats: Apply Like a Pro with a Deck Sprayer
Key Takeaways
- Applying a durable non-skid coating is one of the most impactful upgrades for your hunting boat, improving safety and extending the boat’s lifespan.
- Proper surface preparation, including sanding, cleaning, and sealing seams, is crucial for ensuring the coating adheres well and lasts for years.
- Using professional spraying equipment helps achieve an even, textured finish that provides superior traction and protects against corrosion and UV damage.
- Multiple thin coats with the right curing time create a tough, long-lasting non-skid surface that can handle wet, muddy, and rough hunting conditions.
- Routine maintenance like regular cleaning, spot repairs, seasonal inspections, and proper storage prolongs the life of your boat’s deck coating and keeps it performing at its best.
When it comes to upgrading your hunting boat, few improvements make as big a difference as applying a durable non skid coating. If you’ve ever slipped on a wet aluminum deck while handling gear, you already know why this upgrade is a must. Using a deck sprayer, you can easily apply a professional-grade non-skid deck coating that not only improves traction but also extends the life of your boat.
Whether you’re restoring an old rig or finishing a new duck hunting boat, this guide will help you achieve a factory-quality result that lasts for seasons. With the right tools and a quality deck sprayer, the application process becomes smooth, efficient, and gives you a tough, textured finish that stands up to harsh conditions.
Why a Non-Skid Deck Coating Matters
A non-skid coating isn’t just a cosmetic touch, it’s a safety and performance upgrade. Duck hunting boats operate in some of the most challenging conditions imaginable: wet decks, cold mornings, muddy boots, and restless dogs. A reliable deck coating gives you the grip and stability needed to move safely, even when the surface is slick.
Beyond traction, a non-skid deck coating provides protection against corrosion, UV damage, and general wear. Aluminum, fiberglass, and wood all benefit from the additional shield a quality deck coating offers. For hunters, it means more time on the water and less time worrying about maintenance.
Key benefits include:
- Safer footing and fewer slips in wet or icy conditions
- Added resistance against saltwater, UV rays, and chemicals
- A smoother, professional finish when applied with a deck sprayer
- Easier cleaning and longer deck life
Choosing the Right Non Skid Coating for Your Boat
Before starting, make sure you’re using a marine-grade non-skid deck coating that suits your boat’s material. Aluminum, wood, and fiberglass each have specific requirements for adhesion and durability. Look for coatings that are flexible, waterproof, and UV-stable. A polyurethane or epoxy-based formula tends to work best for most hunting boat applications.
Pay attention to the texture level, too. A coarse grit provides maximum traction, ideal for duck hunting boats where gear and mud are common. Finer textures offer comfort for areas where you may kneel or sit.
How to Prepare Your Deck for Non Skid Coating
- Clean and Degrease -Use a marine cleaner to remove grease, oil, old paint, and dirt. Pressure washing helps, but ensure the surface is fully dry before coating. If there’s rust or corrosion, sand it down to bare metal.
- Sand the Surface -Light sanding helps the non skid coating adhere better. Use 80 –120 grit sandpaper for aluminum or wood. Wipe down with acetone or a solvent cleaner afterward.
- Mask Off Hardware-Cover hardware, cleats, and hatches with masking tape or plastic film to prevent overspray. A clean, defined edge adds to the professional look once your deck sprayer work is done.
- Apply Primer (If Recommended)-Some non-skid deck coatings bond better with a marine primer. Apply one thin coat using a brush or sprayer and allow it to dry as directed by the manufacturer.
The Best Non-Skid Coating for a Hunting Boat: Step-by-Step Guide
Step 1: Prep the Surface, Sanding and Cleaning

Before applying any non-skid coating, preparation is everything. A well-prepared surface ensures the coating bonds properly and lasts for years. Start by sanding every surface you plan to coat, including the deck, gun trays, and interior sides. Use 60-grit sandpaper or a coarse Scotch-Brite pad to roughen the aluminum. The goal is to remove oxidation and create a surface the coating can grip onto. Once sanding is done, vacuum out all the dust and debris. Then, wipe everything with acetone to remove oils or residue. Skipping this step can lead to poor adhesion and peeling later.
Pro Tip:The cleaner and rougher your surface, the better your non-skid deck coating will stick.
Step 2: Seal the Seams and Joints

The next step is sealing. Every seam, corner, or joint where aluminum panels meet needs to be caulked. This helps prevent water intrusion under your coating and creates a seamless, professional look once finished. Use a silicone-free caulk, such as DAP Dynaflex Ultra, since silicone sealants can interfere with coating adhesion. Run a smooth bead of caulk along every seam and level it out with a gloved finger or plastic tool. Let it dry completely before moving on.
Why it matters:Proper sealing keeps moisture out and prevents corrosion, crucial for long-lasting protection in a hunting environment.
Step 3: Apply a Primer Base Coat

Once your seams are sealed and the surface is dry, it’s time to apply a primer. Primer acts as the bond between your aluminum surface and your non-skid coating. You can use a dedicated primer like Raptor’s epoxy primer or a two-in-one option such as One Hit Wonder Paint. Both improve adhesion and durability. Use your sprayer to apply a thin, even coat across the entire surface. This doesn’t need to be perfect, just a solid foundation for the next layers. Let it dry for about one to two hours before continuing.
Pro Tip:Don’t skip primer. It’s what gives your coating the grip and resilience needed to handle heavy use.
Step 4: Mix the Non-Skid Coating

Now for the fun part, mixing your non-skid coating. The Raptor Liner system is one of the most durable and popular choices for aluminum boats. Each kit comes with a liner and a hardener. Pour the hardener into the liner bottle, seal it, and shake vigorously for two full minutes. This activates the mixture and ensures consistency. Only mix one bottle at a time. Once activated, the coating starts curing quickly, so work in small batches to avoid waste.
Pro Tip:Under-shaking can cause adhesion issues, make sure to shake thoroughly for the full two minutes.
Step 5: Spray the Coating with a Deck Sprayer

Attach your mixed liner directly to the Raptor spray gun and set your air pressure to 40–60 PSI, depending on your desired texture. Hold the sprayer about 18–24 inches from the surface and use long, smooth passes. Start with a light mist coat and gradually build coverage. Avoid spraying too close, that can cause heavy buildup. Let the first coat dry for about 10–15 minutes, then apply the second. Two or three light coats create the best balance of toughness and texture.
Step 6: Build Up the Layers

Patience is key here. Building up multiple thin coats gives a more even, durable finish. Spray from different angles, front to back, side to side, to ensure every corner and rail is evenly coated. Between coats, clean your gun tip with a little acetone to prevent clogging. Once you’re satisfied with the coverage, let the coating rest for about 20–30 minutes before removing any masking tape.
Step 7: Remove Tape and Allow to Cure

When the surface feels dry to the touch but still flexible, carefully remove the masking tape. This ensures crisp edges without tearing. Allow the coating to fully cure for 5–7 days before heavy use. It may be dry within hours, but full curing gives it that rock-hard durability.
Pro Tip:Avoid dragging gear or walking heavily on it during curing, patience here pays off with years of durability.
Step 8: Enjoy Your Upgraded Duck Hunting Boat

Stand back and admire your work! You’ve transformed your hunting boat into a durable, slip-resistant machine that’s ready for any season. Not only does this coating improve traction and safety, but it also adds corrosion resistance and a sleek, professional finish that elevates your entire setup. Whether you’re gearing up for early morning hunts or rugged fishing trips, your boat’s deck is now built to last.
Spray-On vs. Hydro-Turf: Which is Right for Your Build?
When planning your deck, you’ll eventually hit a crossroads: do you spray a coating or stick down EVA foam? While spray-on non-skid is incredibly durable and utilitarian, it’s important to weigh it against the "TBN Gold Standard"Hydro-Turf.
- Traction and Comfort: Hydro-Turf provides a marine-grade grip that stays much cooler in the direct sun compared to dark spray-on liners.
- The Silence Factor: If you are running high-end electric outboards like the ePropulsion Spirit or Navy 6.0, stealth is your biggest advantage. Hydro-Turf offers superior noise dampening and vibration reduction that thin coatings just can't match.
- Aesthetic Customization: Spray-on is great for a rugged look, but Hydro-Turf allows you to dial in specific community-favorite color schemes like Swamp Camo, Cobblestone, or Driftwood to give your skiff that professional "bass boat" finish.
- Weight Management: For lightweight builds like a 10ft Pond Prowler or aportable jon boat every pound counts. Spray-on coatings can add significant weight, whereas EVA foam is ultra-light.
2. Technical Pro-Tips: Surface Prep and Climate Control
Google rewards content that solves the "how-to" side of a project. Based on our shop’s historical data, here are the technical "boulders" you need to consider before you pull the trigger on a deck coating.
- The 65°F Temperature Rule: Just like with our 3M peel-and-stick adhesives, youmust apply your deck coatings in a warm, dry environment—ideally above 65°F. If you apply it in a cold garage, the bond may fail, leading to peeling when you hit the water.
- "Measure Twice, Spray Once": Once a non-skid coating is applied, it is essentially permanent. Ensure all yourframing,riveting, andDry Hatch fitments are finalized before the coating goes down. You don’t want to be drilling 3/16” holes for countersink rivets through your fresh finish.
- Edge Sealing for Extreme Climates: If you’re an "Arctic Builder" taking your rig into freezing waters, the aluminum hull will expand and contract. For maximum longevity, we recommend using an additional marine-grade contact cement on the edges of your deck materials to prevent lifting in extreme cold.
- Planning for Plumbing: If you are adding a livewell or bilge system, make sure your thru-hull drains and hoses are routed before you seal the deck. Accessing these components after a non-skid application can be a nightmare for future maintenance.
How to Apply Non Skid Coating with a Deck Sprayer
Step 1: Mix Your Coating
Begin by carefully reading and following the manufacturer’s instructions for mixing your non skid coating. If your product includes a hardener, add it just before you start spraying to ensure maximum effectiveness. Some coatings come pre-mixed with texture grit, while others require you to add grit separately for slip resistance. Make sure to mix thoroughly, but avoid over-shaking as this can introduce bubbles into the coating. Proper mixing is essential for an even finish and long-lasting durability.
Step 2: Test Spray
Before applying the coating to your boat, always perform a test spray on a scrap piece of material or a hidden section of the deck. This helps you adjust your sprayer’s pressure and spray pattern to avoid uneven coverage or overspray. Check that the mist is fine and consistent without any heavy blobs or splattering. Adjust the nozzle or air pressure as needed until you achieve a smooth, controlled spray. Testing ensures you will get professional results and reduce waste.
Step 3: Apply Thin, Even Coats
Hold your sprayer about 8 to 12 inches away from the surface and apply the coating in steady, overlapping strokes. Thin, multiple coats are better than one thick layer because they dry more evenly and reduce the risk of drips or runs. Move your arm smoothly and consistently to avoid streaks or uneven texture. Allow each coat to dry for the recommended time before applying the next. This layering technique builds up a durable, uniform non-skid surface.
Step 4: Add Texture Grit
If your coating does not already include texture grit, sprinkle fine grit or silica sand over the wet surface immediately after spraying each coat. This creates the rough, slip-resistant finish necessary for safety on wet decks. Once the coating has dried, gently remove any loose grit that has not bonded to the surface. Then, apply a sealing coat over the textured area to lock in the grit and protect the finish. This step is key for a reliable non-skid surface that lasts.
Step 5: Curing Time
After your final coat, allow the non-skid coating to cure fully before using the boat. Most marine-grade coatings require 24 to 72 hours of curing time, but check your product’s specific instructions. Avoid placing gear or walking on the surface too soon as this can damage the texture or cause imperfections. Proper curing ensures the coating bonds completely and achieves its full strength and durability. Patience during this step pays off with a professional-quality finish.
Duck Hunting Boat Ideas for a Better Deck Layout
- Two-Tone Camo Finish -Blend your deck coating colors for a camouflage effect. Use a dark base and lighter patches to break up reflections. This reduces glare and keeps your boat stealthy.
- Traction Zones-Apply coarse texture where you stand most, like near shooting positions, and smoother finishes in storage areas. Zonal texture enhances comfort without sacrificing grip.
- Gear-Friendly Layout -Mask off or coat around storage boxes, gun racks, and dog platforms for a seamless look. A smooth transition between these sections makes your hunting boat easier to clean and maintain.
- Color Considerations -Choose flat, non-reflective shades like tan, olive, or sand. These hide dirt, resist heat, and blend into natural surroundings. Avoid glossy finishes that can alert wary ducks.
Maintaining Your Non Skid Deck Coating
Routine Cleaning
After every trip, rinse your deck thoroughly with fresh water to remove salt, dirt, and debris. Use a mild soap and a soft-bristle brush to gently clean the surface without damaging the texture. Avoid using harsh chemicals or solvents, as these can break down the coating and cause it to lose its protective qualities. Regular cleaning keeps your non-skid surface looking fresh and functioning properly. Consistent care also helps prevent buildup that could reduce traction.
Spot Repairs
If you notice any chips, cracks, or thin areas in your coating, address them promptly to avoid further damage. Lightly sand the affected spot to create a smooth surface for better adhesion. Then, use your deck sprayer to apply a small amount of fresh coating to the area. Performing these small repairs early prevents moisture from seeping underneath, which can cause corrosion and peeling. Keeping up with spot repairs extends the life of your entire deck coating.
Seasonal Inspection
Before each hunting season or heavy use period, take the time to carefully inspect your deck coating. Look for any signs of cracking, fading, or wear that might affect performance or safety. Addressing these issues by recoating or spot repairing helps maintain both the appearance and the protective qualities of the coating. Regular inspections catch problems before they worsen, saving you from costly repairs later. Staying proactive ensures your boat stays ready for every outing.
Storage Tips
When you’re not using your hunting boat for an extended time, proper storage is essential for protecting your deck coating. Store the boat under a solid cover or use a breathable tarp to shield it from direct sunlight and harsh weather. Prolonged sun exposure can cause fading and premature wear of the coating’s surface. Keeping your boat covered also reduces dirt buildup and moisture damage during the off-season. Good storage habits will keep your non-skid deck coating looking and performing great for years.
Pro Tips for Applying Like a Professional

- Apply during mild weather (between 60°F and 85°F) for optimal adhesion.
- Keep your sprayer clean to prevent clogging between coats.
- Avoid spraying in direct sunlight or high humidity.
- Always wear protective gear such as gloves, goggles, and a respirator.
- Stir coatings slowly to avoid air bubbles.
The Reward: A Safer, Stronger, and Better-Looking Boat
By investing a little time and care into applying a non-skid deck coating, you transform your hunting boat into a safer, stronger, and more efficient machine. Every step you take, from thorough surface preparation to smart spraying with a deck sprayer and routine maintenance, adds to the lifespan and overall performance of your vessel. This upgrade creates a rugged and reliable platform built to withstand real-world hunting conditions.
With your non-skid coating applied evenly, you can focus on what really matters, landing the perfect shot instead of worrying about slipping or balance. If you are searching for practical duck hunting boat ideas that make a genuine difference, starting with your deck is one of the simplest and most effective improvements you can make. Done right, this upgrade will serve you faithfully through many hunting seasons to come.
Frequently Asked Questions
1: Why is a non-skid coating important for a hunting boat deck?
A non-skid coating improves traction on wet or slippery surfaces, reducing the risk of slips and falls. It also protects the deck material from corrosion, UV damage, and general wear, making your boat safer and longer-lasting in tough hunting environments.
2: How do I prepare my boat deck before applying a non skid coating?
Start by cleaning and degreasing the surface thoroughly, then sand it lightly to help the coating bond better. Seal all seams and joints to prevent moisture intrusion. Mask off hardware to protect it from overspray, and apply a marine primer if recommended.
3: What type of coating is best for aluminum hunting boats?
Marine-grade coatings that are polyurethane or epoxy-based tend to work best. They offer flexibility, waterproofing, and UV resistance. Choose a coating with the right grit texture for your needs, coarser grit for maximum traction and finer textures for comfort.
4: How many coats of non-skid coating should I apply?
It’s best to apply two to three thin, even coats. Multiple thin layers create a more durable and consistent texture while preventing drips or uneven buildup. Allow each coat to dry fully before applying the next.
5: How long should I wait before using my boat after coating?
Most marine non-skid coatings need between 24 and 72 hours to cure completely. For full durability, avoid heavy use or placing gear on the surface for at least 5 to 7 days to allow the coating to harden properly.
6: How do I maintain my non-skid deck coating?
Rinse your deck with fresh water after each trip and clean it gently with mild soap and a soft brush. Address any chips or thin spots quickly with touch-up coatings. Inspect the deck seasonally for wear and store the boat under cover during off-season to protect the coating.


Recent Posts


Please select the Blog in the settings on the right sidebar to display it
Join Our VIP List
Join the Tiny Boat Nation VIP Members List.
It's Free! Stay Up To Date With Announcements, Product Give Aways, News and Promotions.